

Stencils: What Paper to Use
What’s the best paper to use when you make a stencil?
For me personally, it comes down to a few factors: how easy it is to cut through the paper, how much detail you can get, re-usability, cost, etc. I’ll go over some of the most common options, but don’t think that these are the only options.
I’m going to assume you’re like me: trying to get by with cheaper materials and still get a decent stencil out of it. Most of the stuff I’ve painted was printed on a cheap $30 printer, but we upgraded to one that cost about $50 more. Don’t worry about print and material quality so much when you’re just going to cut, paint, and throw it out. On the other hand, I made sure to include some of the easily re-usable materials as well.
Card Stock
This is one of my favorite stencil materials. It’s not too expensive ($15/250 pages), and if you pick up the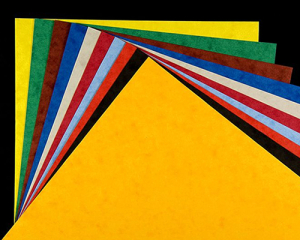 goofy neon colors when they’re on sale, you’re set. Again, color doesn’t matter, and you can get away with using these a couple times before they get mangled beyond use.
I used to use 110 lb weight paper because it was easy enough to get good detail with an X-Acto knife, but thick enough that the paper wouldn’t fall apart on the really detailed parts. The downside is that it’s difficult to get real natural lines and fine detail, and if you’re using a dull blade, you can count on having to turn the sheet over and re-cut the other side of your stencil. I usually end up with a bunch of rough frayed paper on the edges that, if you’re using spray adhesive, will leave behind little white specs around the edges of your nice clean colors.
If you don’t have any spray adhesive handle, this is a great material to throw a few coins on to weight down. It’s usually stiff enough to keep flat if you’re careful when you’re cutting.
Photo Paper (Glossy)
Photo paper has pretty much the same advantages/disadvantages as card stock, with the exception of a glossy side. One major pitfall is cost. I usually only use photo paper if it’s around and I don’t have anything better.
If you print on the backside of the paper and cut through with the glossy side on the bottom, you can get away with cleaner edges. I usually try to avoid this because the spray adhesive dots up and won’t soak into the paper as well. If you don’t let it dry just right, it’ll end up on your canvas. Spraying on the matte side works pretty well, but at that point you might as well have just bought card stock.
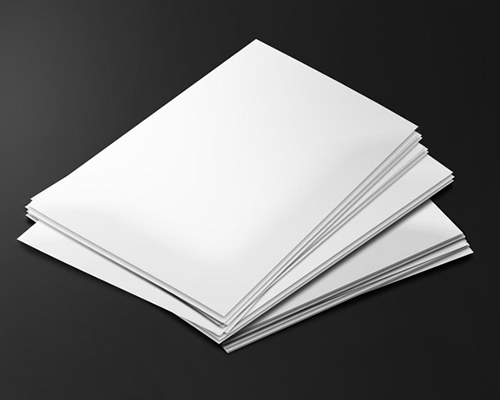
Plain White Printer Paper
A lot of people balk at using plain printer paper for a stencil, but it’s the first and still one of my most used materials.
 You have to be careful about a few things: don’t press a sweaty hand on the paper for too long or it’ll bulge and wrinkle. It’s very easy to cut or tear off pieces, and moving a complicated stencil around usually leaves you with a few folded details.
On the other hand, it’s extremely easy to cut and get clean lines, a thin coat of spray adhesive holds it very well, and of course, it’s cheap.
I usually run a couple lines of clear packing tape over the parts of the paper with an outline to cut to give the paper an extra layer for stiffness. The tape helps bring the up the thickness without being as difficult and messy to cut, and prevents folding parts of the stencil with your knife as you’re cutting. If you feel like spending 50 cents a sheet, buy 8.5×11 single-piece lamination sheets and throw it over the whole sheet. It won’t be much different than photo paper, but more expensive at that point.
It may not be my favorite stencil material, but I use regular printer paper about 70% of the time.
Overhead Projector Transparency Sheets
You remember those relics from the 70’s. The tan or grey boxes your teacher would wheel into the classroom with a Johnny-5 looking mirror and lens that craned up over top. They would write on transparency sheets with dry or wet erase markers, but the printed part would stay on the page.

I found a pack of these cheap on eBay a while back and decided to try them out for stencils because there’s a kind with a printable backside. Don’t accidentally buy the kind with two glossy sides; you won’t be able to print on either. The ones with a rough backside can be printed on, and easily cut through.
You can get amazingly clean lines because it’s all plastic, and thick enough that you shouldn’t need to use spray adhesive (small weights or coins are usually fine). The really great part is that if you keep a mineral-oil based paint thinner around (a couple bucks at the hardware store), you can wipe down your stencil and use it dozens of times.
Be sure to wash off all of the thinner with water and dry it after you clear the plugged up spots in the stencil. If you let the thinner sit on it too long, it’ll actually melt the plastic or make it wrinkle a little. After that, it’s hard to keep flat and spray adhesive doesn’t like plastic very much. This is why I can’t use acetone thinners like my beloved Goof-Off; it works too quickly and can damage the stencil.
Too Long, Didn’t Read
If you have money, buy printable overhead projector transparency sheets and set the spray adhesive aside.
If you have some money, buy card stock and double-check your edges.
If you’re broke or lazy, plain white printer paper and some tape on top’ll do just fine.
Want to see what I mean about detail work with tape over plain paper? Check out the shading in the handle of the revolver at around :32 seconds:
[iframecode url=’https://www.youtube.com/embed/OTNqIg7xAgw’]

Good tips for someone who might foul up the first attempt, and quit after an initial failure. This might help a newby over the rough spots. Thanks for posting these tips.
Informative. Liked the end summary. Also, clear packaging tape over printer paper really does wonders for a lot of art related stuff, so props for sharing this secret! Good article, good info, good place for a novice to get started…excellent work.